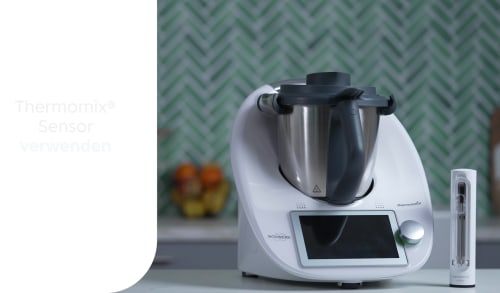
Der Thermomix® Sensor ist der perfekte Begleiter in deiner Küche und unterstützt dich dabei, stets perfekte Ergebnisse zu erzielen.
Egal ob Fisch, Fleisch, Brot oder Kuchen. Folge den Anweisungen auf dem Display deines Thermomix® TM6 oder in der Cooking Center App und lehne dich entspannt zurück - sobald dein Gargut fertig ist, erhältst du eine Benachrichtigung.
● Guaranteed success for recipes made inside and outside Thermomix®.
● Food always cooked to the right stage.
● Comfort of tracking the status on your smartphone.
● Relaxation of not having to monitor and control the result.
Beef, pork and lamb
Steaks and chops – insert Thermomix® Sensor horizontally from one side of the steak/cut.
Big cuts of beef, pork or lamb (ex.: roasts) - insert Thermomix® Sensor diagonally from the top.
Cuts with bones - insert Thermomix® Sensor diagonally from the top.
Poultry
Whole birds - insert the probe in the thickest part of the breast.
Breasts - insert the probe horizontally in the thickest part of the cut.
Cuts with bones and whole birds - make sure the probe is not touching the bones.
Fish
Fillets - insert probe horizontally in the thickest part.
Whole fish - insert the probe in the thickest part and avoid touching the spine and bones.
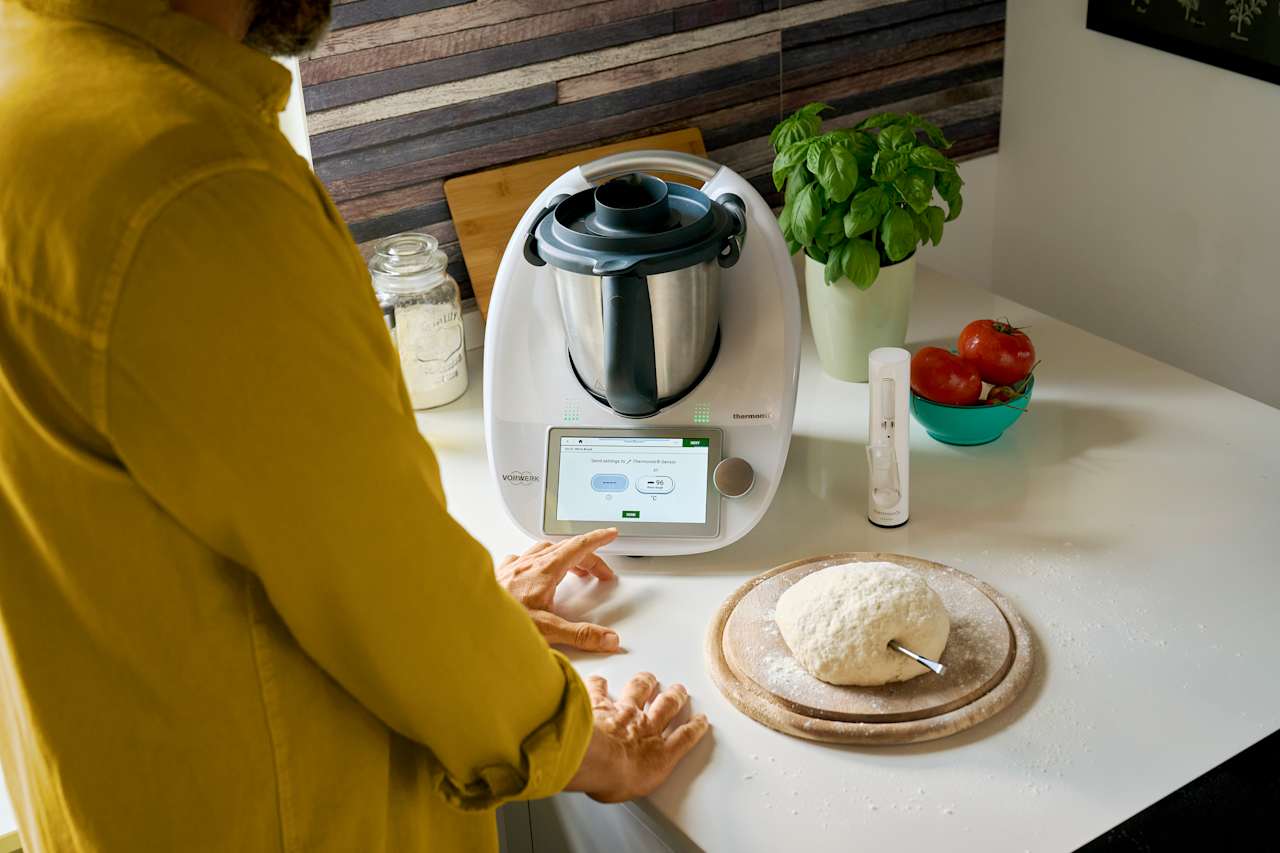
Bread
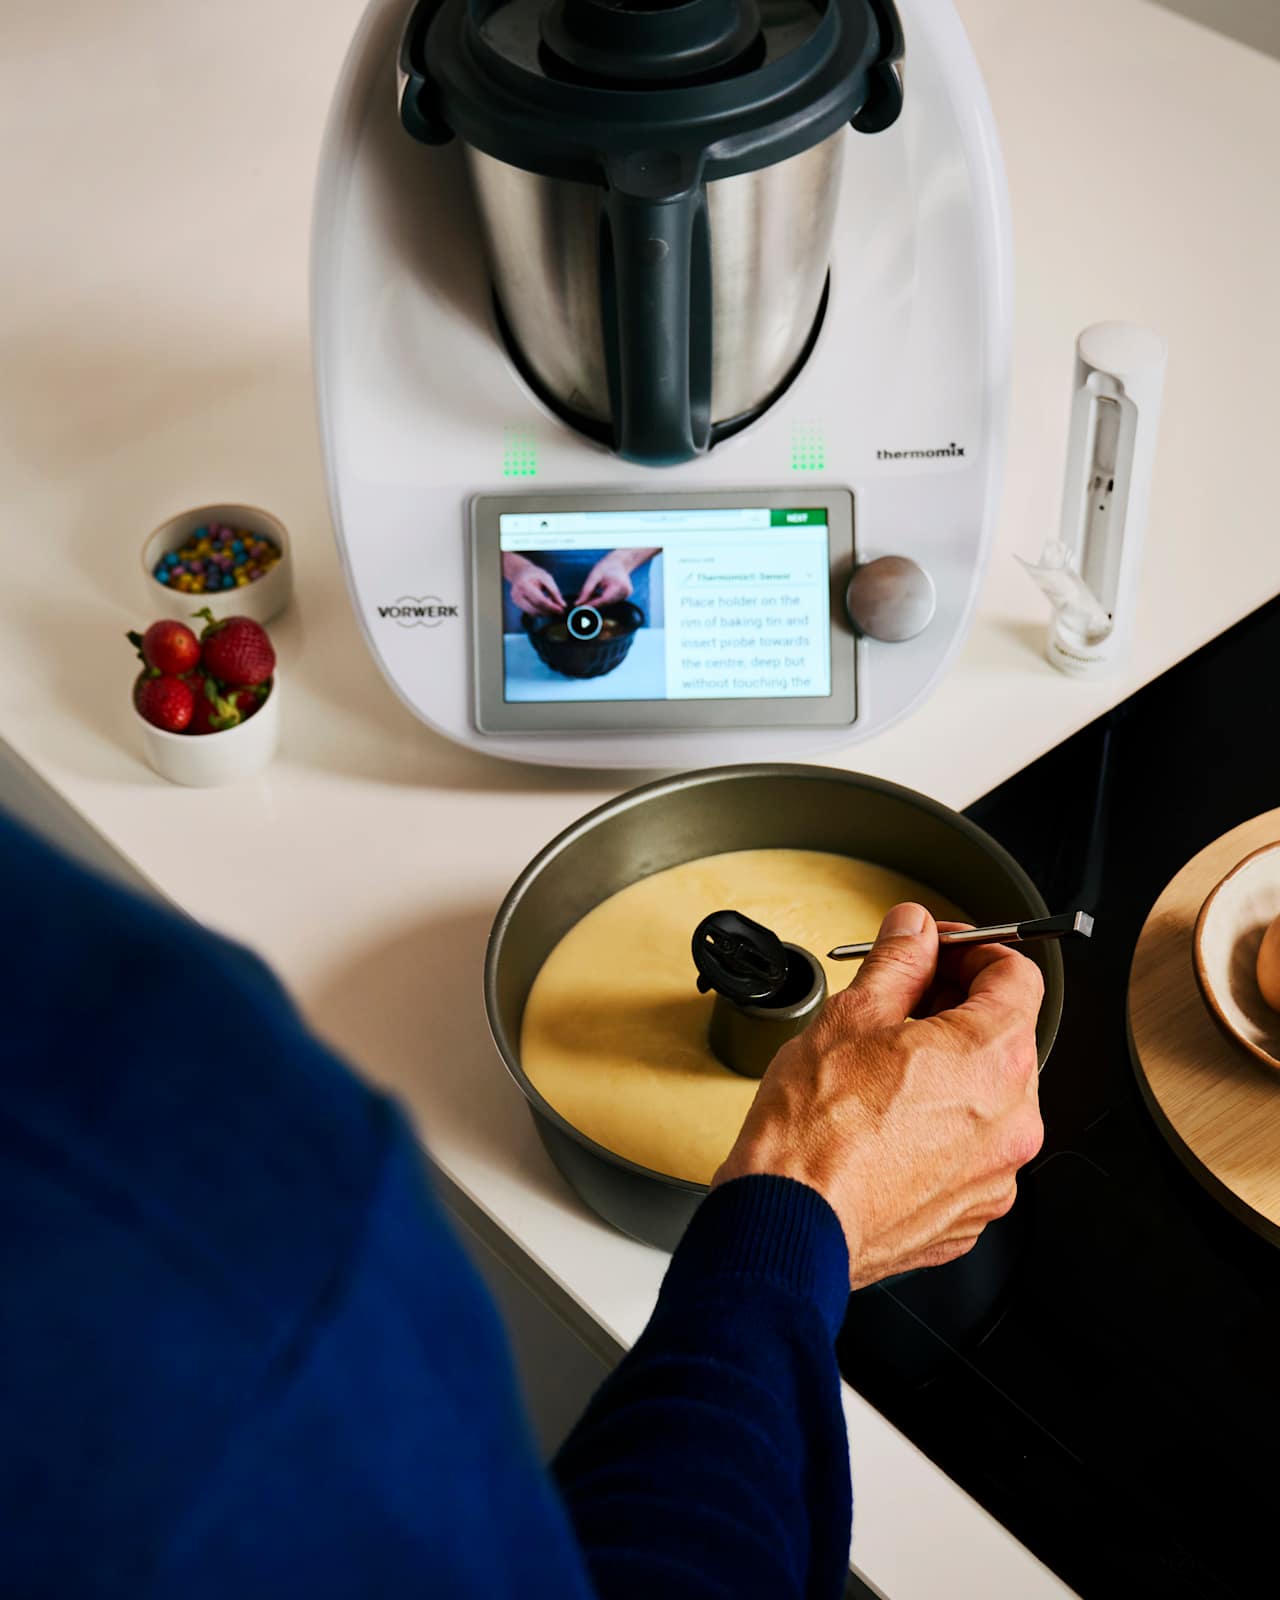
Insert the Thermomix® Sensor into the dough ensuring the tip is in the core of the dough and the reference notch entirely or close to the dough surface. If the dough is not firm enough to hold it, use a baking tin and the holder to keep the thermometer in place. Make sure the tip of the probe does not to touch the baking tin.
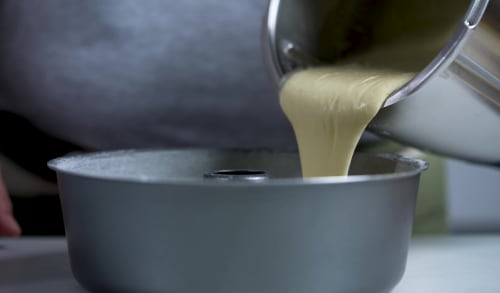
Cakes
Use the holder piece to keep Thermomix® Sensor in the right position, weather it is a thin layer of batter or a deep one.
Sensor verwenden
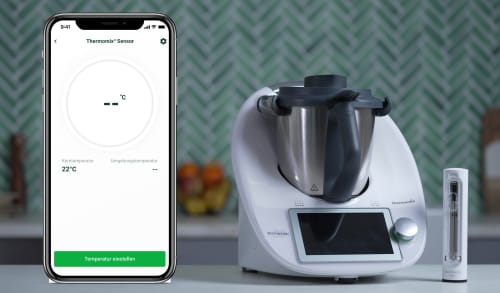
Sensor Modus auf dem TM6
Cooking Center App
Gar kein Problem! Mit dem Thermomix® Sensor kannst du auch deine eigenen Ideen in Perfektion umsetzen.
Viele Anwendungsbeispiele zur Verwendung des Thermomix® Sensors findest du bereits in der Cooking Center App oder im "Thermomix® Sensor"-Modus auf deinem TM6. Von Fisch über Fleisch und Geflügel bist hin zu Brot und Kuchen sind die Kerntemperaturen für viele Kategorien bereits voreingestellt zu finden.
Es kann auch hilfreich sein, nach ähnlichen Rezepten auf Cookidoo® zu suchen und diese als Vorlage für dein eigenes Rezept zu verwenden.
Deshalb ist der Thermomix® Sensor auch bei der Zubereitung von Kuchen und Broten eine echte Unterstützung:
Wenn du dir mit der Wahl der passenden Kerntemperatur nicht ganz sicher bist, orientiere dich an unseren Guided-Cooking-Rezepten für Kuchen und Brot.
Achte bei der Zubereitung von Fleisch und Fisch darauf, dass sich die Spitze des Sensors möglichst mittig in der dicksten Stelle des Garguts befindet. Sollten sich Knochen oder Gräten im Gargut befinden, achte darauf, dass diese den Sensor nicht berühren.
In der Ruhe liegt die Kraft: Um bei Bratenstücken ein saftiges und zartes Ergebnis zu erzielen, verwende möglichst niedrige Temperaturen von 120°C bis 160°C (Umluft).
Verwende bei Steaks und kleineren Teilstücken von 140°C bis 200°C (Ober- und Unterhitze), wähle deinen Garpunkt aus und der Sensor übernimmt den Rest.
Wenn du dir mit der Wahl der passenden Kerntemperatur oder der Positionierung des Sensors nicht ganz sicher bist, orientiere dich an unseren Guided-Cooking-Rezepten aus der Kollektion "Garantiert gelungen".
Thermomix® Sensor is suitable for most of your kitchen appliances: oven, barbecue, air fryers, pans on the stove and with sous-vide bags.
When using Thermomix® Sensor with an oven, the result might vary slightly, depending on whether you use a static or a fan oven. For optimal results with an air fryer, check out the tips in the linked article below!
The Cooking Center allows you to check, from any screen on your Thermomix® TM6 display and at any time during the cooking session, the current cooking status of your recipe step. Whether in Guided Cooking mode or cooking manually, click on the Cooking Center menu on top of your screen and access:
● Your recipe status: remaining cooking, time, current and target temperature and speed.
● Timer
● Thermomix® Sensor
Getting started with Thermomix® Sensor is quick and easy (for detailed guidance see the instruction manual):

Before cleaning, allow the probe to cool down.
Clean the probe and the holder, before and after every use, with water and washing-up liquid. Do not use cleaning products with alcohol, ammonia, benzene or abrasives as these could damage the device.
Do not place the probe under water for long periods of time.
Before putting it back in the charger, make sure that probe and holder are totally dry.